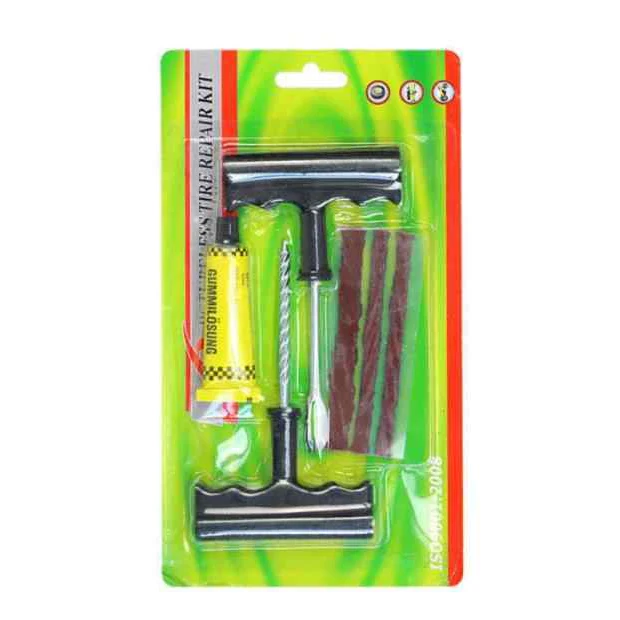
When faced with a punctured tire, many drivers feel the immediate urge to rush to a garage. However, with the right tools and know-how, you can handle minor tire repairs at home. One of the most essential items you can have in your DIY tire repair kit is a Tire Repair Tool. This versatile device can save you time and money by allowing you to fix flats on the spot.

Before diving into the specifics of what you can use, it's crucial to understand the basics of tire repair. Not all punctures can be repaired at home. Generally, small punctures, usually no larger than a quarter of an inch in diameter, can be safely repaired with a Tire Repair Tool. Larger holes, sidewall damages, or punctures in the tire's tread area close to the edge may require professional attention.
Your DIY tire repair kit should ideally include the following items:
Tire Repair Tool: This is the star of your kit. A Tire Repair Tool typically comes with a reamer, an insert tool, and a set of tire plugs. The reamer cleans and enlarges the hole, the insert tool pushes the plug into the hole, and the plug seals the puncture.
Tire Gauge: Keeping an eye on your tire pressure is vital both before and after a repair. A tire gauge helps ensure your tire is inflated to the manufacturer's recommended psi.
Tire Sealant: While not a replacement for a Tire Repair Tool, tire sealant can be a temporary fix for slow leaks. It's especially useful in emergencies where a full repair isn't feasible.
Gloves: Protecting your hands is important when dealing with sharp objects and potentially harmful chemicals.
Jack and Lug Wrench: These tools are essential for safely raising your vehicle and removing the affected tire.
Safety First: Always ensure your vehicle is in a safe location, ideally on a flat, hard surface. Engage the emergency brake and chock the wheels if necessary.
Remove the Tire: Use the jack to lift your vehicle and remove the punctured tire.
Inspect the Damage: Locate the puncture and inspect it to ensure it's suitable for a DIY repair.
Prepare the Hole: Use the reamer end of the Tire Repair Tool to clean out the puncture and slightly enlarge the hole. This helps the plug adhere better.
Insert the Plug: Insert the tire plug into the insert tool and push it firmly into the hole. Twist it slightly to ensure it's seated properly.
Trim the Excess: Once the plug is in place, trim off any excess material using a utility knife or scissors.
Reinflate the Tire: Use a tire gauge to check and adjust the tire pressure to the recommended level.
Reinstall the Tire: Put the tire back on your vehicle and lower it to the ground.
Test Drive: After the repair, take a short test drive to ensure the tire holds air and there are no issues.
Like any tool, proper maintenance ensures it lasts longer and performs better. Keep your Tire Repair Tool clean and dry to prevent rust and corrosion. Regularly check for any signs of wear or damage, and replace worn-out parts as needed.
TradeManager
Skype
VKontakte

